
Python API test automation framework (Part 8) Adding reporting with ReportPortal
Logos in header image sources: Python, Requests, JSON, HTTP, Cerberus ReportPortal
This is the eighth post in a series on how to build an API framework using python.
You can read previous parts below:
- Python API test automation framework (Part 1) Introduction, Setup and Installation
- Python API test automation framework (Part 2) Making HTTP requests
- Python API test automation framework (Part 3) Writing Fluent assertions
- Python API test automation framework (Part 4) Working with XML using LXML
- Python API test automation framework (Part 5) Working with JSON and JsonPath
- Python API test automation framework (Part 6) API response schema validation
- Python API test automation framework (Part 7) Refactoring structure
Ah, Test results reporting is a favorite topic of discussion among test automation engineers.
While everyone wants to create their own reporting dashboard/site because it sure is fun to mess around with JS, HTML, CSS, Store test results in a relational or document database and maybe create some APIs routes using a web framework like Flask, Django.
It’s also true that all this is a lot of work to set up in the correct way. I won’t discourage you if you want to build the next-gen reporting solution that the community can use.
However, Should we really invest our valuable time in reinventing the wheel? Probably not, (at least, if we can avoid it 😉)
The test results reporting space has some great tools and libraries already available that get the job done however, of late one of my absolute favorites is the ReportPortal because of the ton of features it packs out of the box
In this post, We will see how to integrate it into our framework that we’ve been building so far:
Setup ReportPortal using docker
I had previously written a blog on setting up a local ReportPortal instance on Docker and demonstrated a basic Java test on Gradle for reporting. You can read that post here: How to setup ReportPortal on a local docker instance
Essentially, in a nutshell, the setup is quite easy to do using docker as it pulls all the required dependencies and spins up an environment for your use very quickly
Below are the steps to follow to set up your containers
# Step 1: Download docker-compose YAML file
curl https://raw.githubusercontent.com/reportportal/reportportal/master/docker-compose.yml -o docker-compose.yml

# Step 2: Spin up containers
# This will download the images (one time) over the internet so ensure you are on a good connection
docker-compose -p reportportal up -d --force-recreate
Once the above command finishes, verify if all the containers are spun up by executing:
docker ps -a
Once done you should be able to open up the local site at http://localhost:8080/ui/ with default id
and password in ReportPortals website (at the time of writing this blog the credentials are user:
superadmin, password: erebus)
(🙏🏼 : Please change this in any production instance that you wish to use in your organizations unless you want those pesky hackers to have access to your projects test results)
Bug workaround: elastic search keeps on restarting
You might notice that once you log in, you get pop-ups like “An error occurred” and your session is terminated.
To identify the root cause and fix this issue, follow the below steps.
If this works perfectly for you, then feel free to skip these steps and move on to the next section that talks about setting up our framework
docker ps -a
We can observe that part of the problem is that the elasticsearch container keeps on restarting.
7b6052df5d30 docker.elastic.co/elasticsearch/elasticsearch:7.3.0 "/usr/local/bin/dock…" 11 minutes ago Restarting (1) 53 seconds ago reportportal_elasticsearch_1
Yes, I know libraries have their own quirks 🤷🏼♂️, you can fix this quite easily by following the below steps:
# Stop all running containers
docker stop $(docker ps -aq)

# Create /data/elasticsearch directory
mkdir -p data/elasticsearch

# Give permissions
chmod 777 data/elasticsearch

# Change ownership of this directory
sudo chown 1000:1000 data/elasticsearch/

# Finally bring up the containers again
docker-compose -p reportportal up -d
You can even quit docker for mac and restart it once again.
This workaround is from a Github issue on the ReportPortal website. You can see more details here. I even started a thread on the ReportPortal slack channel that you can follow for further discussions.
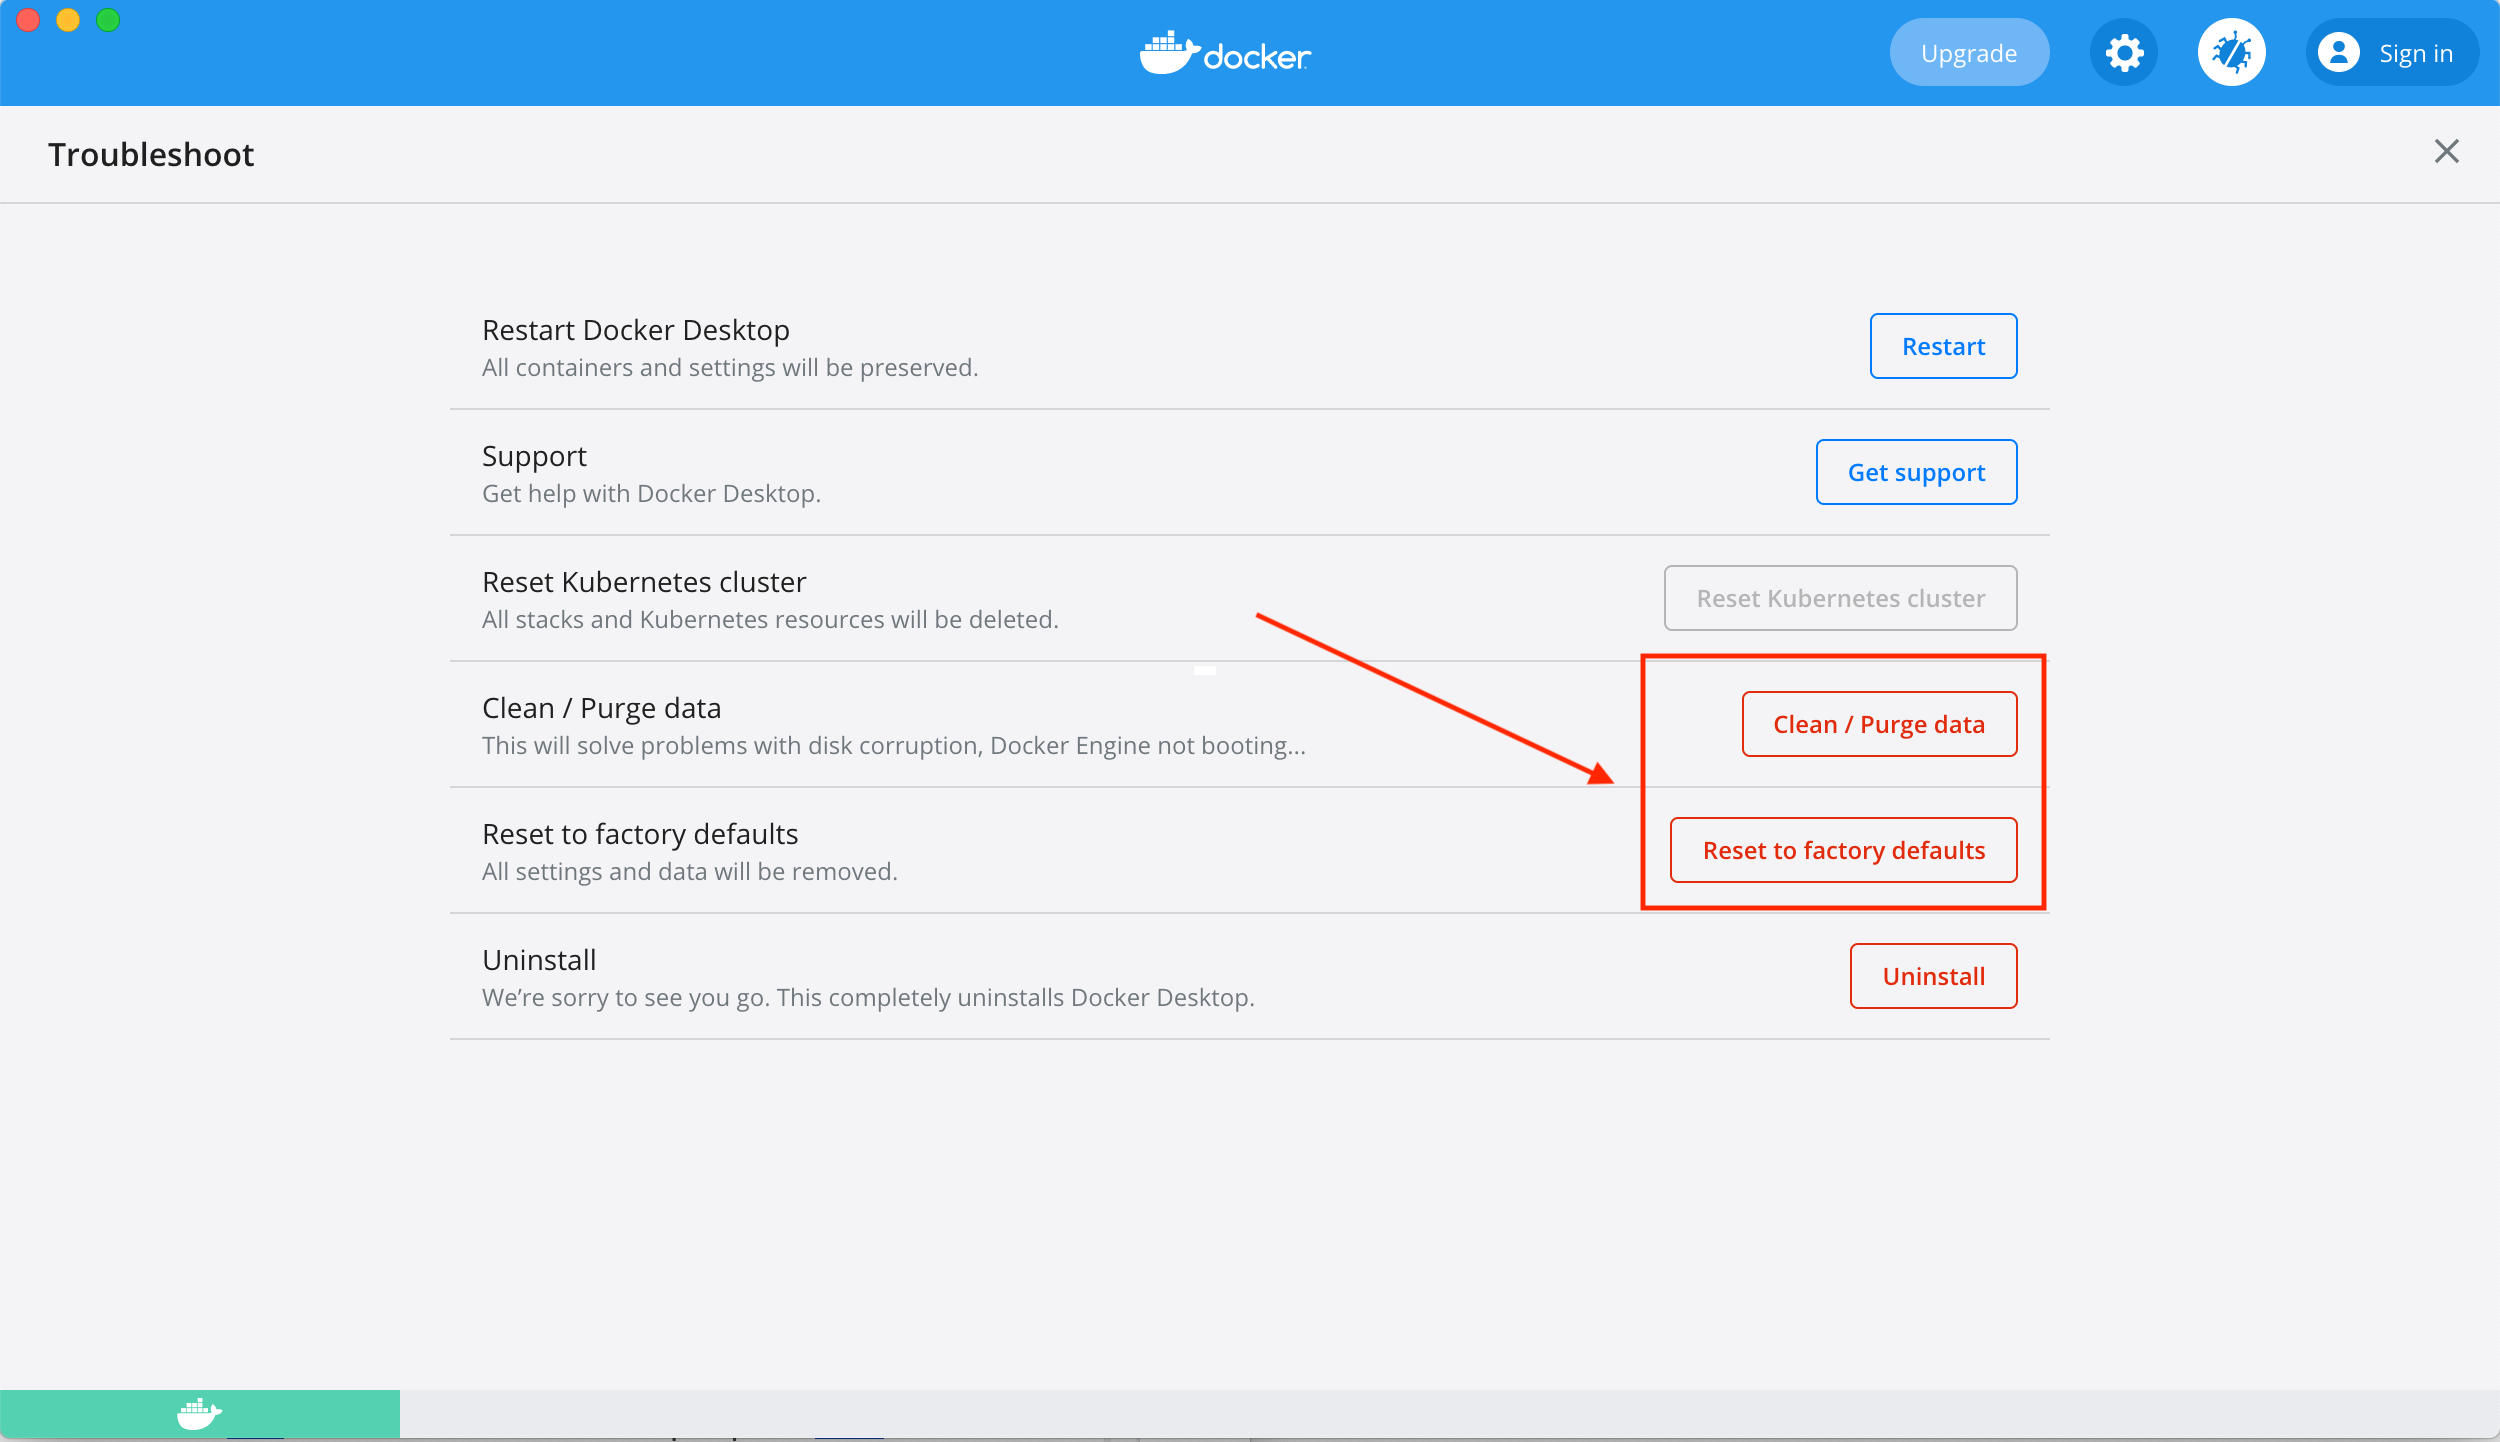
Note: If the above steps still result in elastic search restarting, you can manually reset docker by going to troubleshoot and click on Clean / Purge data and Reset to factory defaults
Integrate with pytest
Let’s understand how we can integrate our test suite (run using pytest) to report results directly into ReportPortal
You can find more details about different types of test framework integrations supported by ReportPortal here
Also, see the complete documentation for the pytest plugin here
Step 1: Create a project in ReportPortal and update pytest.ini file
It is recommended to create a new project in ReportPortal where you want to report test results to:
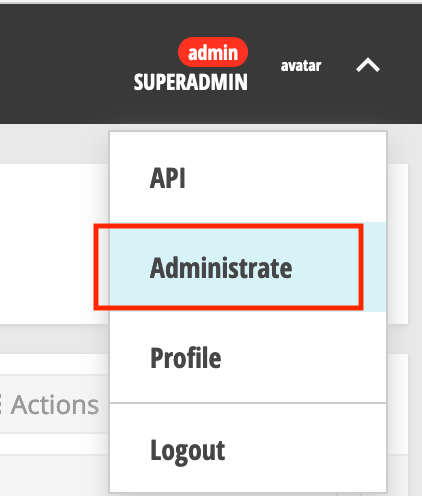
Tap on user profile settings
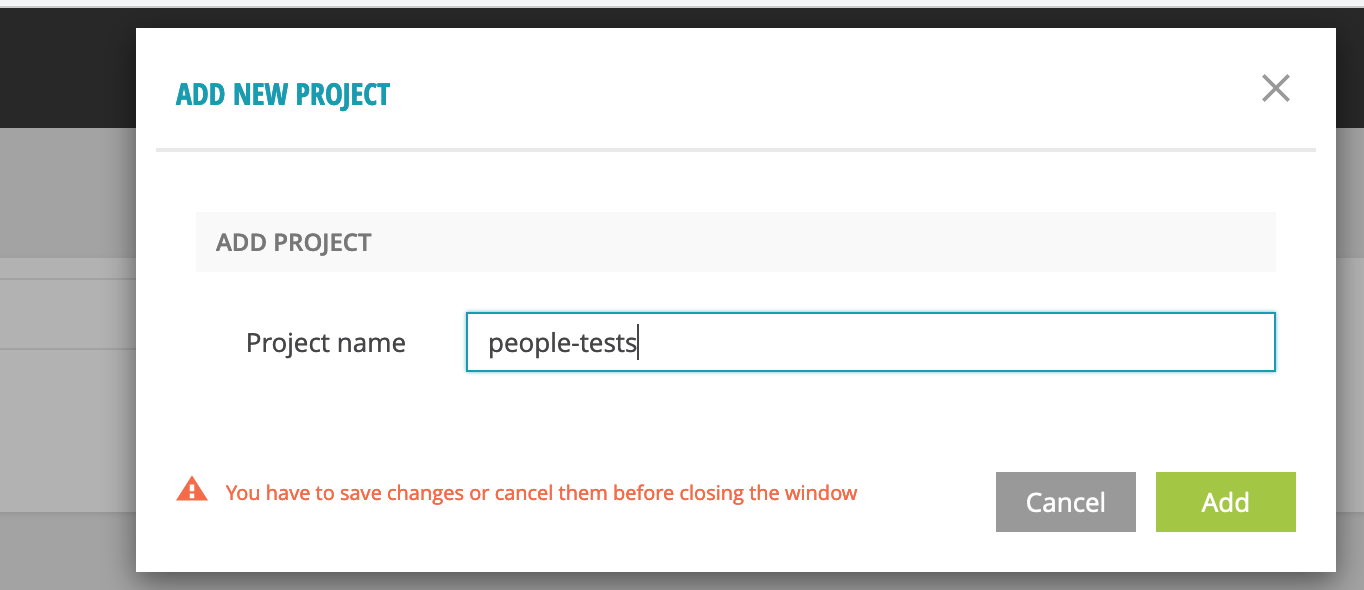
Tap on create a new project and enter a name, we’ll name our project people-tests
Open Profile

You can access the project settings which would be updated in our framework project.
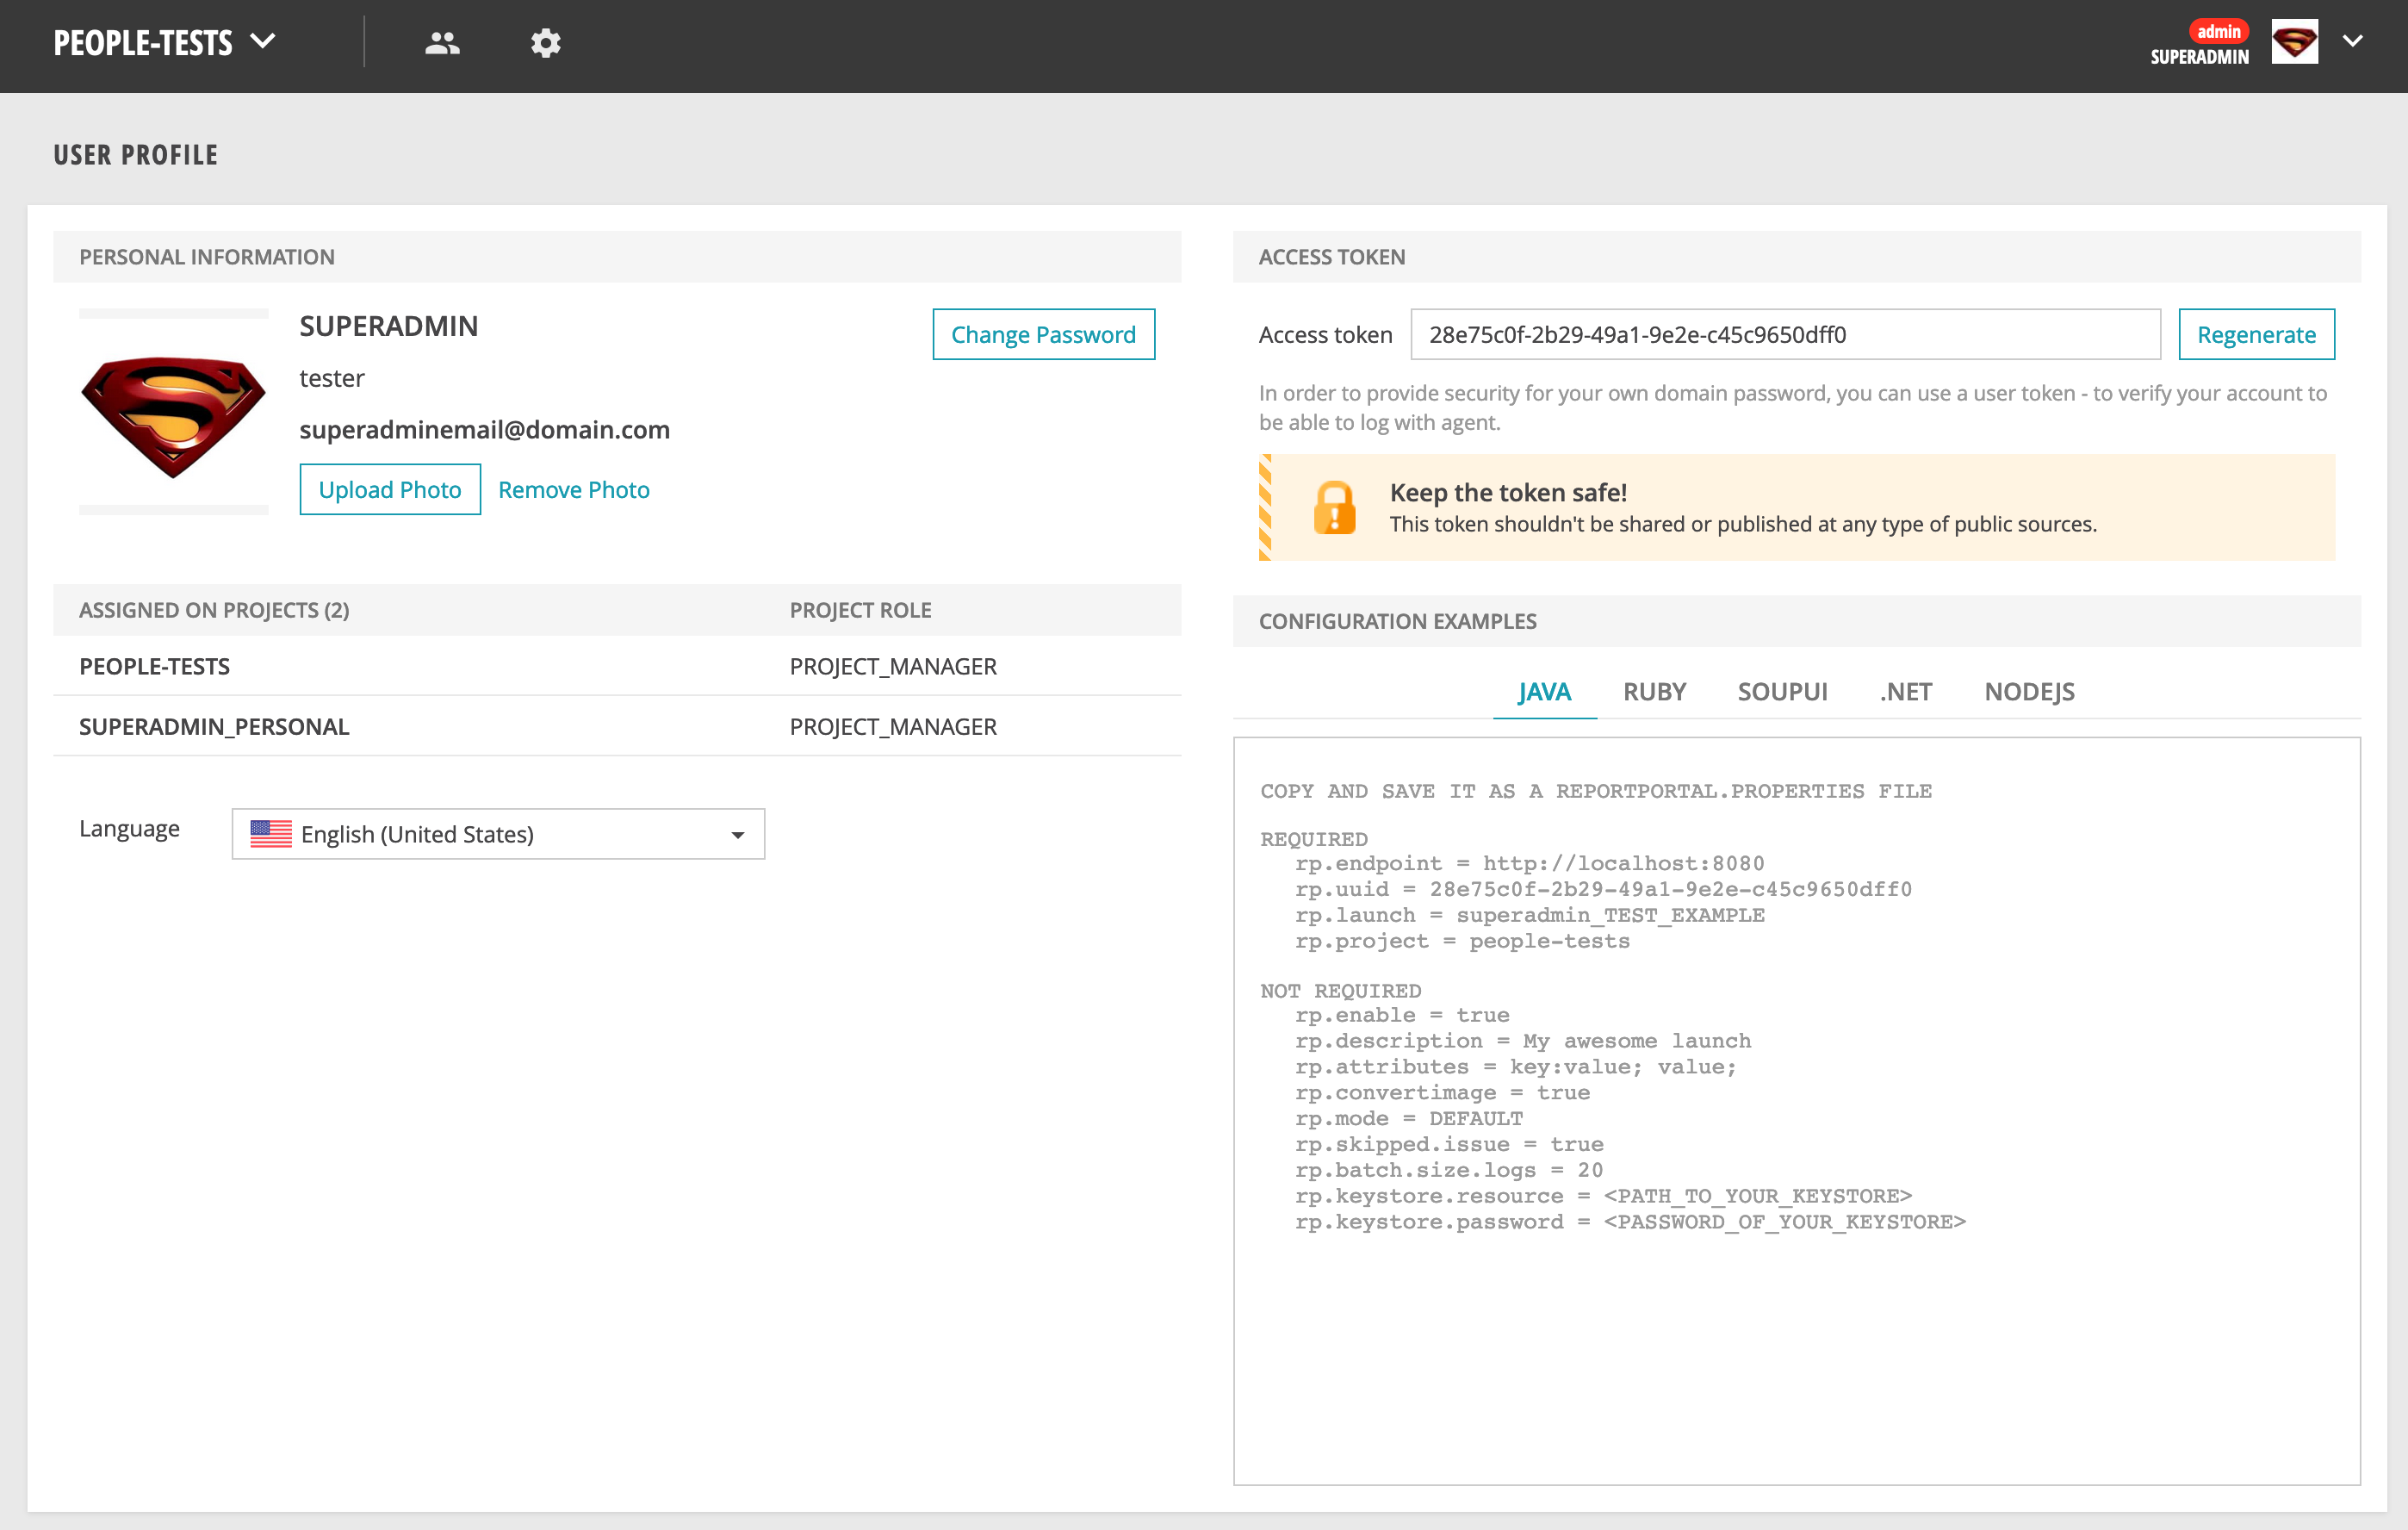
Copy the required fields into a pytest.ini file in the project root
The pytest.ini file allows you to specify some default values that are auto loaded by pytest. You
can also pass these manually via the command line but it can become quite tedious quite fast to pass
these on every execution.
At a minimum, ensure you have the below properties present in the pytest.ini file
rp_uuid = 28e75c0f-2b29-49a1-9e2e-c45c9650dff0 (unique id of the project)
rp_endpoint = http://localhost:8080 (where ReportPortal is hosted)
rp_project = people-tests (name of the project)
rp_launch = people-tests (what the launch will be called)
Below is a complete sample file
[pytest]
rp_uuid = 28e75c0f-2b29-49a1-9e2e-c45c9650dff0
rp_endpoint = http://localhost:8080
rp_project = people-tests
rp_launch = people-tests
rp_launch_attributes = 'PyTest' 'Smoke'
rp_launch_description = 'Smoke test'
rp_ignore_errors = True
rp_ignore_attributes = 'xfail' 'usefixture'
Step 2: Add session-scoped logger
Pytest agent needs the plugin to be installed and registered.
Execute below:
pipenv install pytest-reportportal
We will add a logger method in the module scoped conftest.py file, which would be used in all the test methods to send different types of logs to ReportPortal’s elasticsearch database.
tests/conftest.py
import pytest
from pytest_reportportal import RPLogger, RPLogHandler


@pytest.fixture(scope="session")
def logger(request):
   logger = logging.getLogger(__name__)
   logger.setLevel(logging.DEBUG)

   # Create a handler for ReportPortal if the service has been
   # configured and started.
   if hasattr(request.node.config, 'py_test_service'):
       # Import ReportPortal logger and handler to the test module.
       logging.setLoggerClass(RPLogger)
       rp_handler = RPLogHandler(request.node.config.py_test_service)

       # Add additional handlers if it is necessary
       console_handler = logging.StreamHandler(sys.stdout)
       console_handler.setLevel(logging.INFO)
       logger.addHandler(console_handler)
   else:
       rp_handler = logging.StreamHandler(sys.stdout)

   # Set INFO level for ReportPortal handler.
   rp_handler.setLevel(logging.INFO)
   return logger
Here we make use of the standard python logger class and set RPLogger as the LoggerClass, along with even a console handler if needed. Notice that we’ve marked this fixture as session scope, This ensures the logger is reused and keeps on recording results to the appropriate project in the report portal throughout one test suites run
Step 3: Add logger to tests
We’ll add the newly created logger as a dependency into the test method and pytest would auto-resolve this for us.
def test_read_all_has_kent(logger):
   """
   Test on hitting People GET API, we get a user named kent in the list of people
   """
   response = client.read_all_persons()

   assert_that(response.status_code).is_equal_to(requests.codes.ok)
   logger.info("User successfully read")
   assert_people_have_person_with_first_name(response, first_name='Kent')
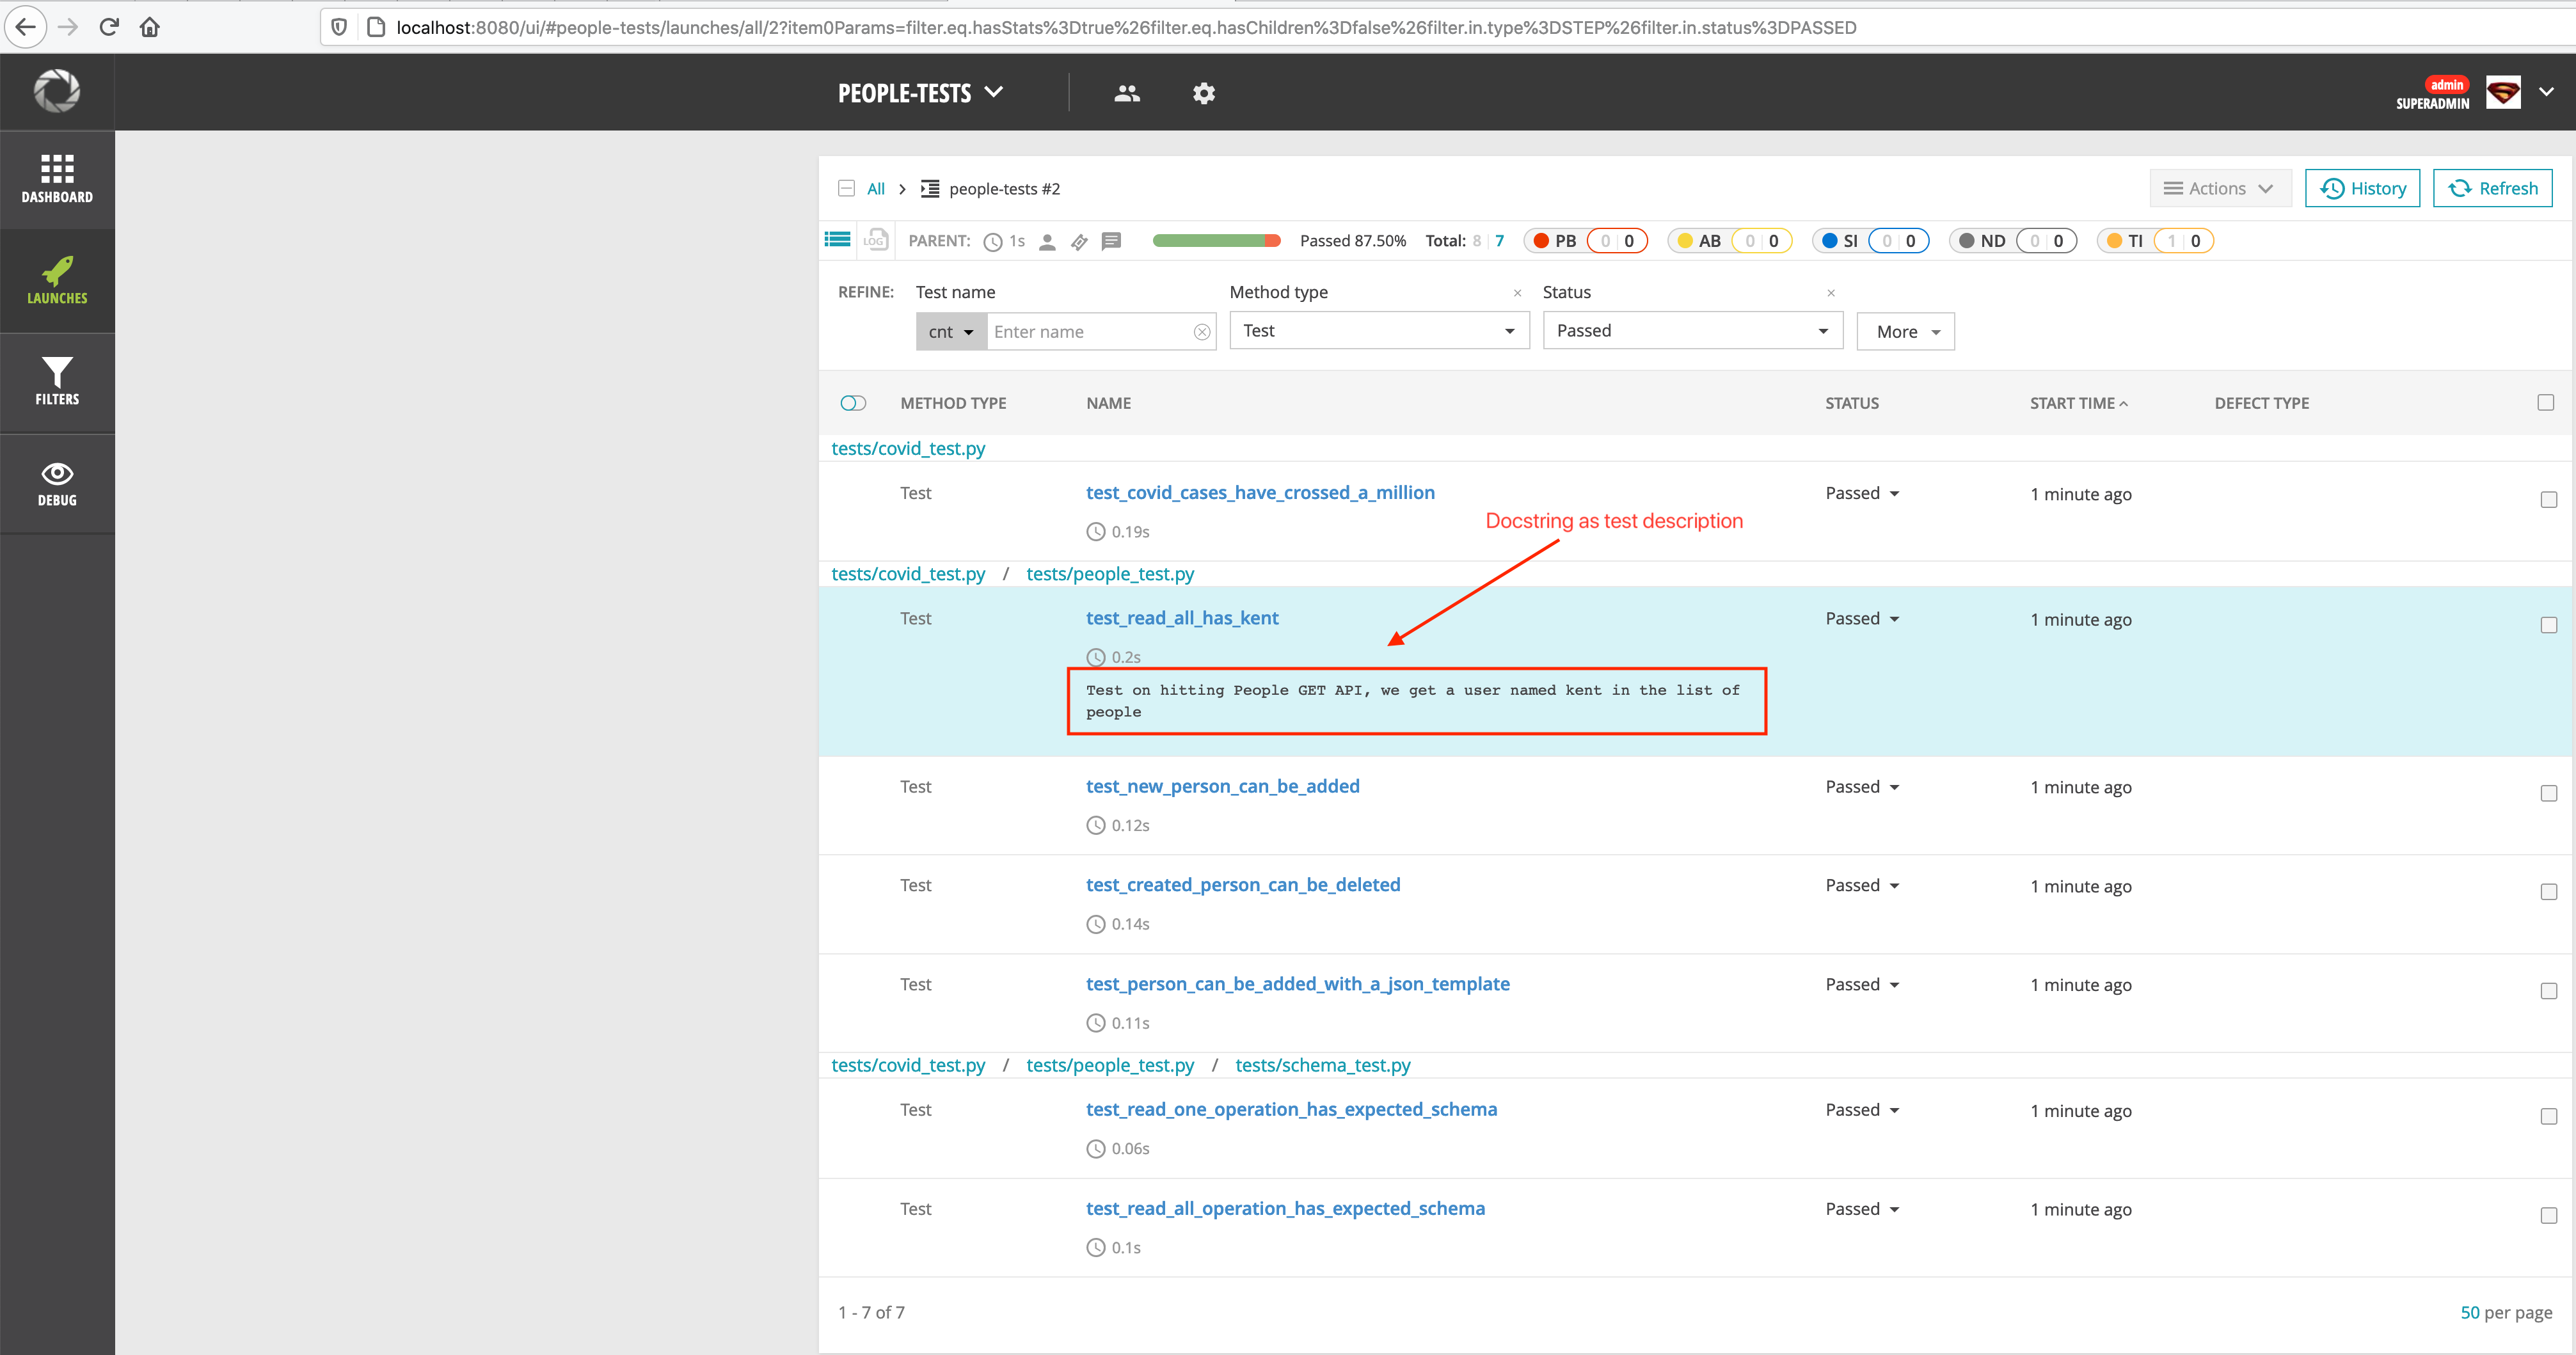
Notice, we’ve added a docstring to the test method
"""
Test on hitting People GET API, we get a user named kent in the list of people
"""
ReportPortal pytest plugin updates all method docstrings as an actual test case description
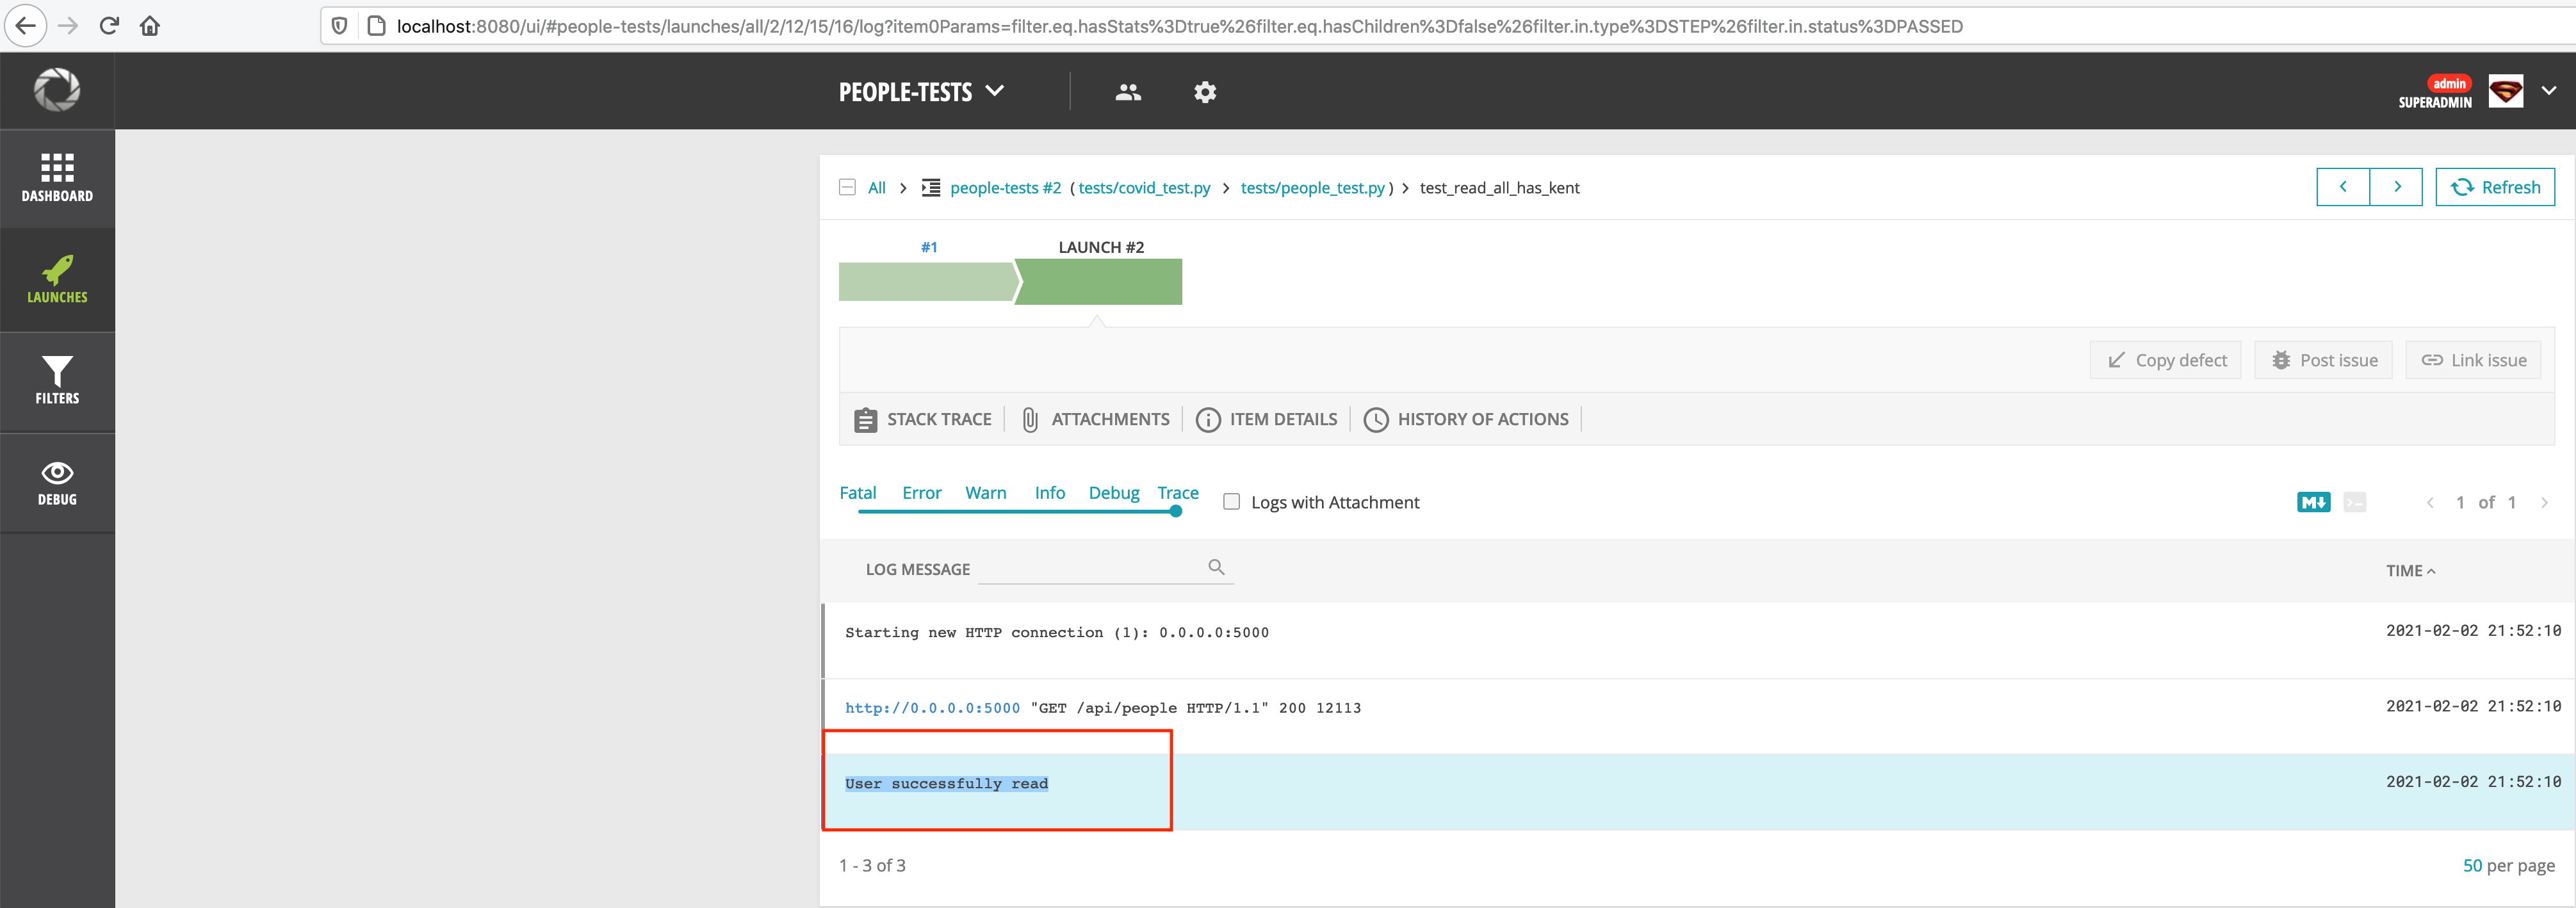
Also, once the status code check passes, we can log the message via the below line:
logger.info("User successfully read")
Step 4: Execute tests
Execute the below command to push logs to ReportPortal. Notice that you would need to add –reportportal flag
python -m pytest ./tests --reportportal
Don’t forget to ensure the people-api and covid-tracker services are up, Refer to Post 2 and Post 4, In case you need a refresher on how to start these on the local machine.
Step 5: Analysis in ReportPortal
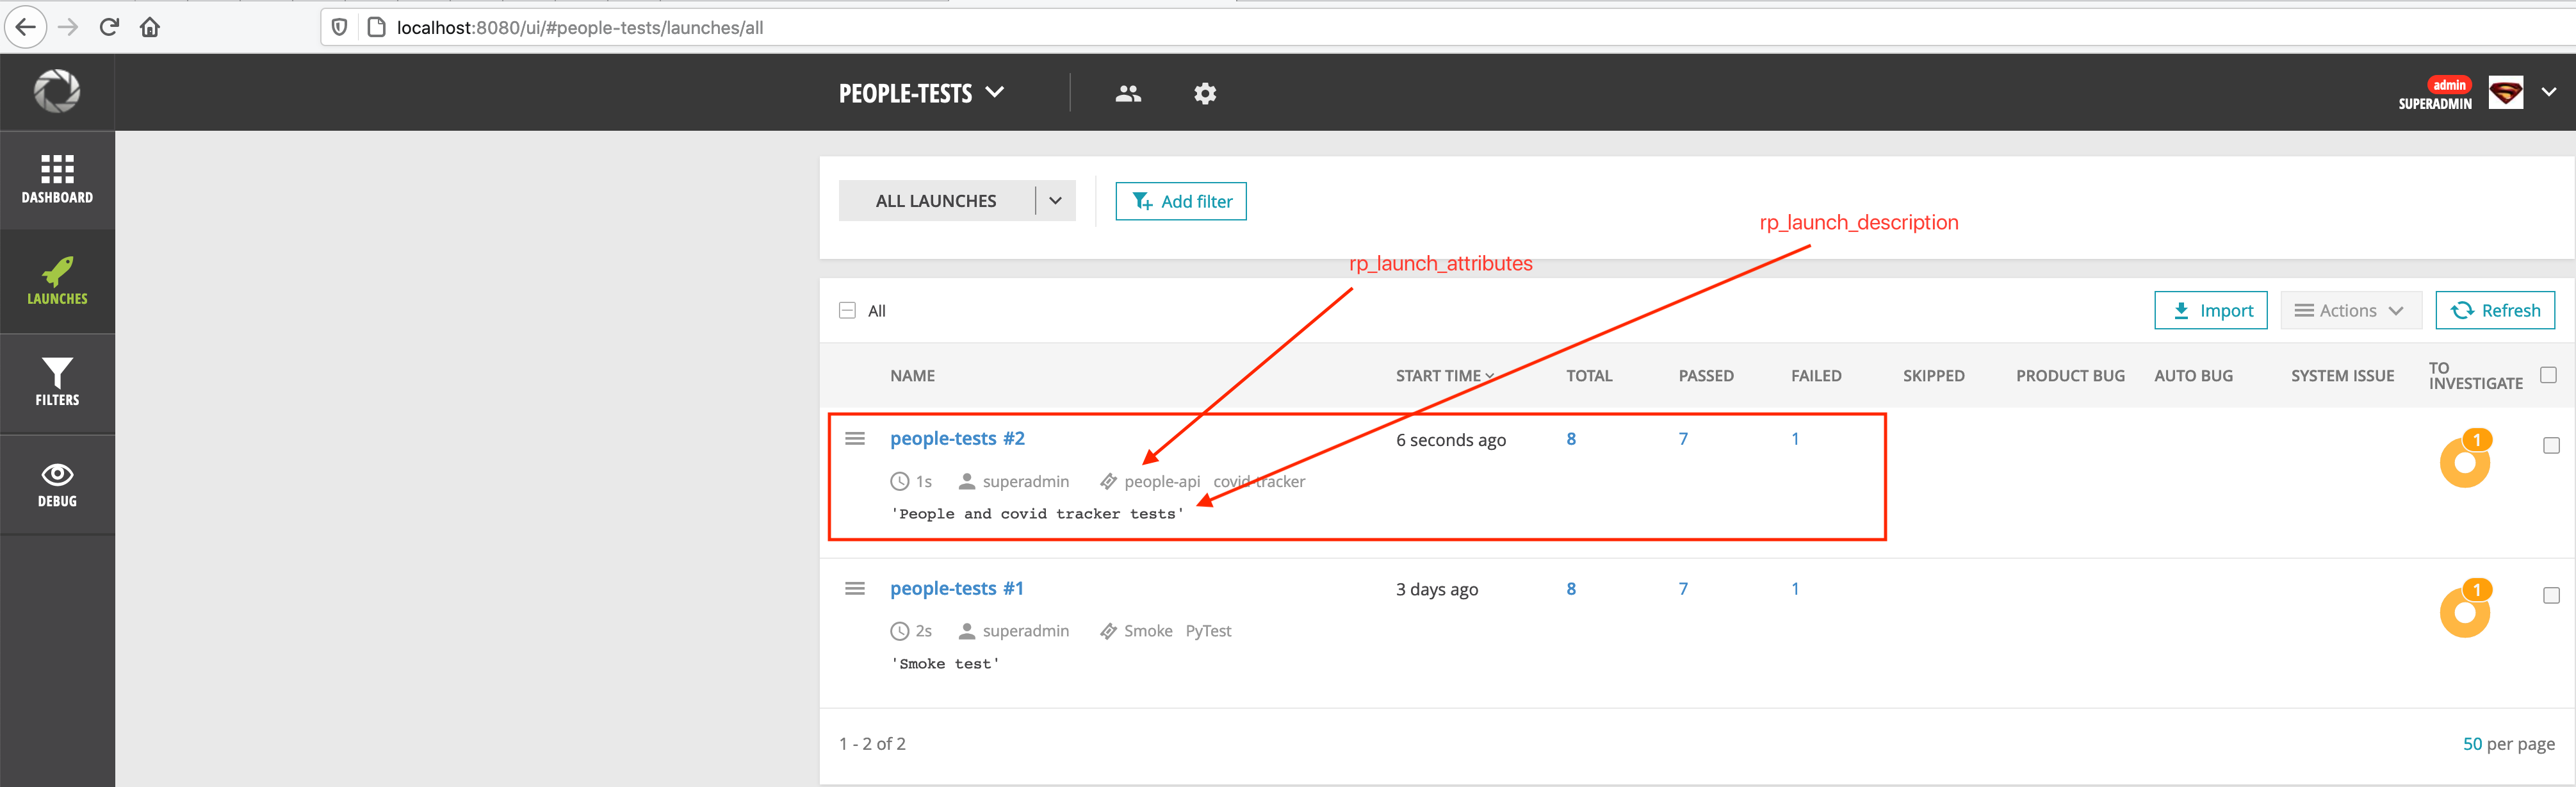
Once run, let’s see how the results would look like in ReportPortal
Below you can see the overall results for the test run. Notice the rp_launch_attributes and
rp_launch_description are displayed on the UI.
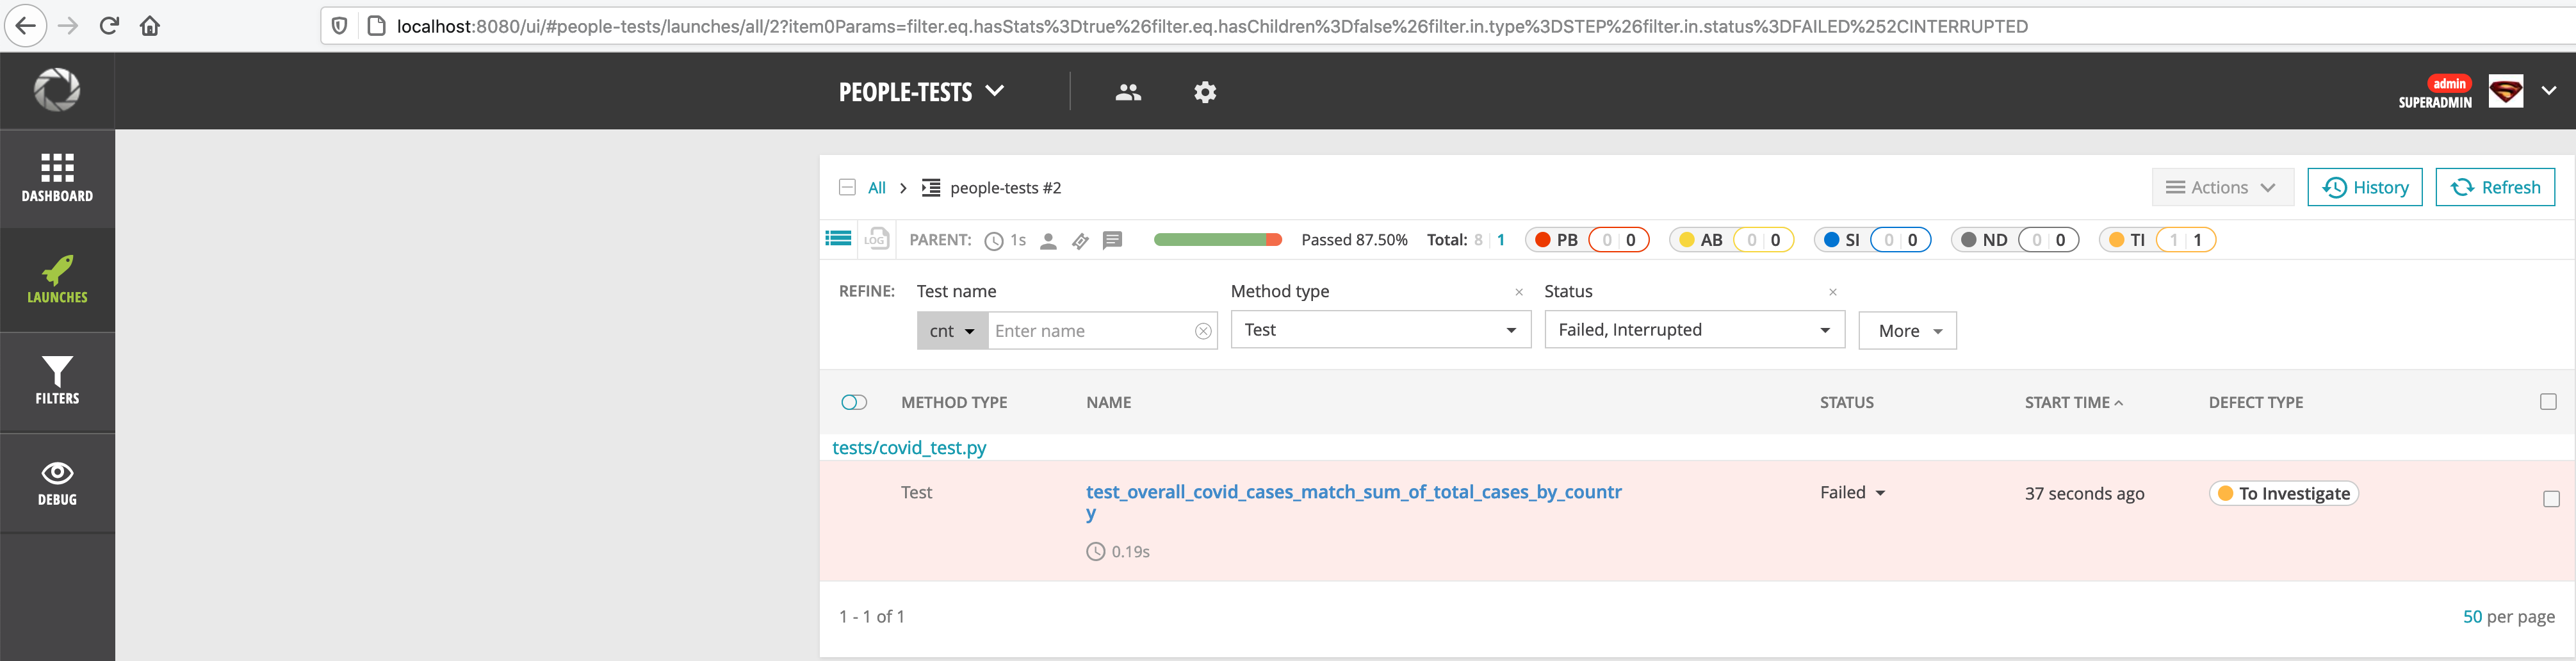
You can select Failed to see the test failure details
You can also see a detailed stack trace for any failures that might have occurred
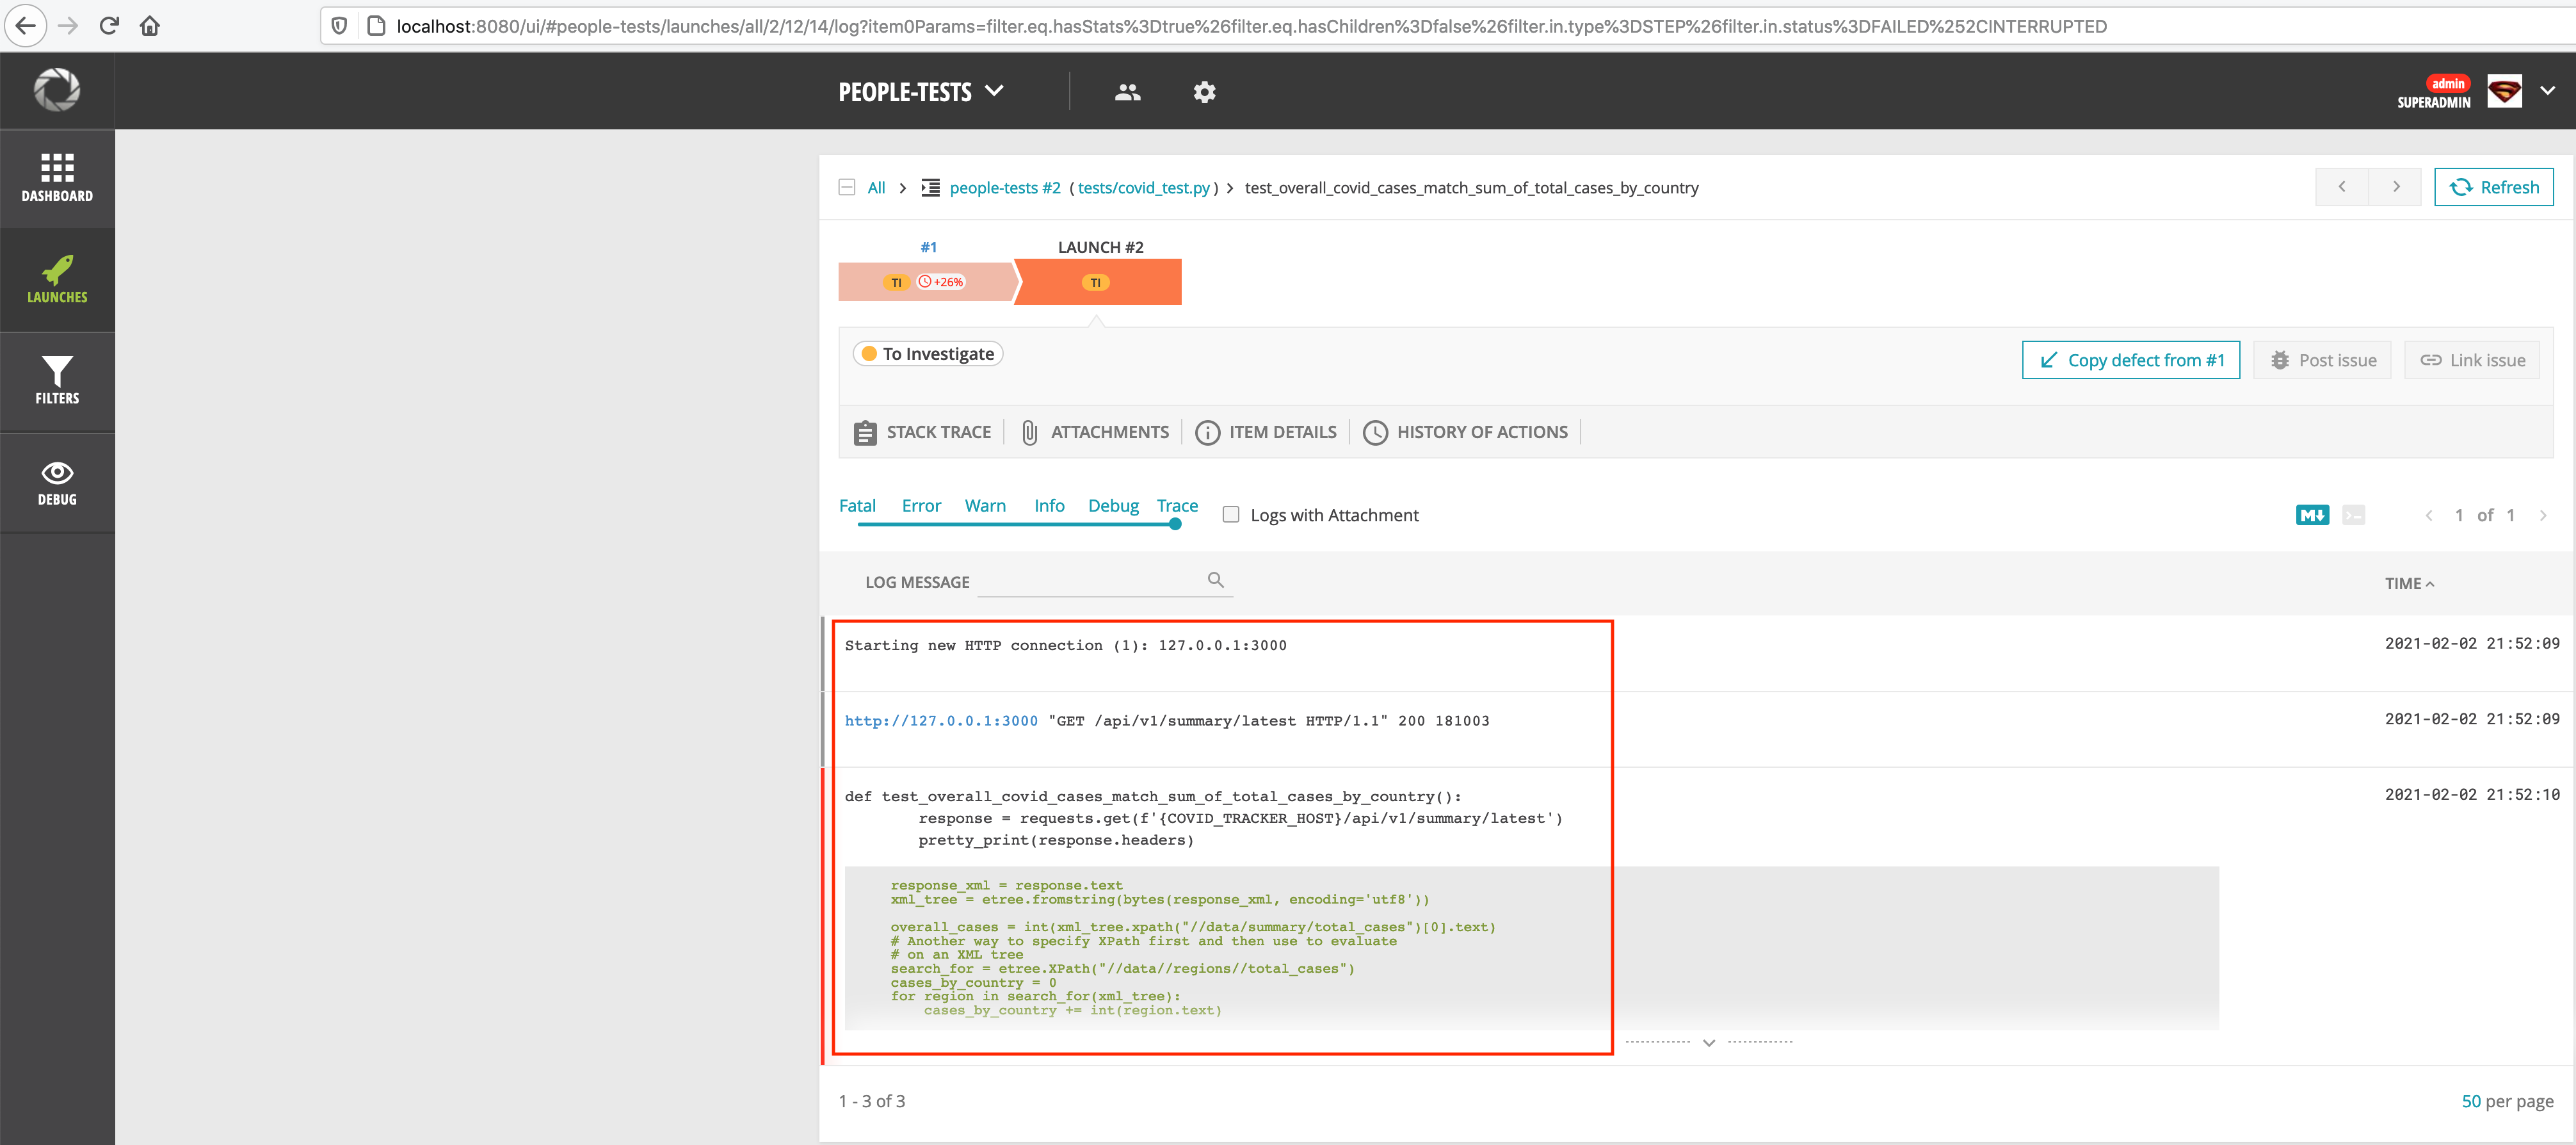
Also, the docstring is displayed as the test method description
And finally, if you open the passing test test_read_all_has_kent, you can see that our log message
is printed
Conclusion
While the ReportPortal might not be the perfect reporting solution out there, it does take care of a lot of common use cases when it comes to Test reporting and easily integrates with your test framework of choice.
I hope this post helps you understand how to set this up for your own python-based framework. Do check out GitHub readme for agent-python-pytest to understand some more features that you can make use of.
You can see this entire code on this Github repo and branch
If you found this post useful, Do share it with a friend or colleague and if you have thoughts, I’d be more than happy to chat over at twitter or comments. Until next time. Happy Testing.
Comments