How to setup ReportPortal on a local docker instance
ReportPortal is one of the new reporting solutions available. It supports multiple different test frameworks like TestNG, Cucumber, Pytest and many more.
This post is the first in a series of posts on how to set up ReportPortal effectively and leverage the best use out of it.
Let’s get started.
Setup with Docker
I have created a sample project on Github which would have all the examples from this project. You can find it here and would also have the code snippets in GitHub gists.
The instructions that I am describing here can also be found on ReportPortal docs for mac or windows
- As a pre-requisite, you should set up an empty Java/kotlin project with Gradle. The easiest way to set this up is with the use of IntelliJ wizard, however, feel free to use the method of your choice
- ReportPortal uses services like PostgresSQL, RabbitMQ, and Traefik behind the wraps and while there is an option to set these up individually without docker, the quickest and simplest way to start using Report portal is to use Docker
- Make sure you have a docker engine and docker-compose already installed. If you are on Mac, Using Docker for mac would make the quickest sense however Docker is available on the platform of your choice (Windows, Linux) and docker docs are a good resource to set these up
- Download latest docker-compose.yml from here, a quicker way to download this is to use below command
curl https://raw.githubusercontent.com/reportportal/reportportal/master/docker-compose.yml -o docker-compose.yml
- Once downloaded, execute below command to pull the required images and start containers
docker-compose -p reportportal up -d --force-recreate
ReportPortal recommends you use allocate at least 3 GB of ram and this could be set up via the Docker desktop console. There are a bunch of other configurations we can make but let’s go with a minimal setup first
We would revisit these in a future post.
Verify login
With the above steps, ReportPortal containers are already spun up.
To verify, it is running fine. You can navigate to
http://localhost:8080/ui/#login
you should be able to see the login screen.
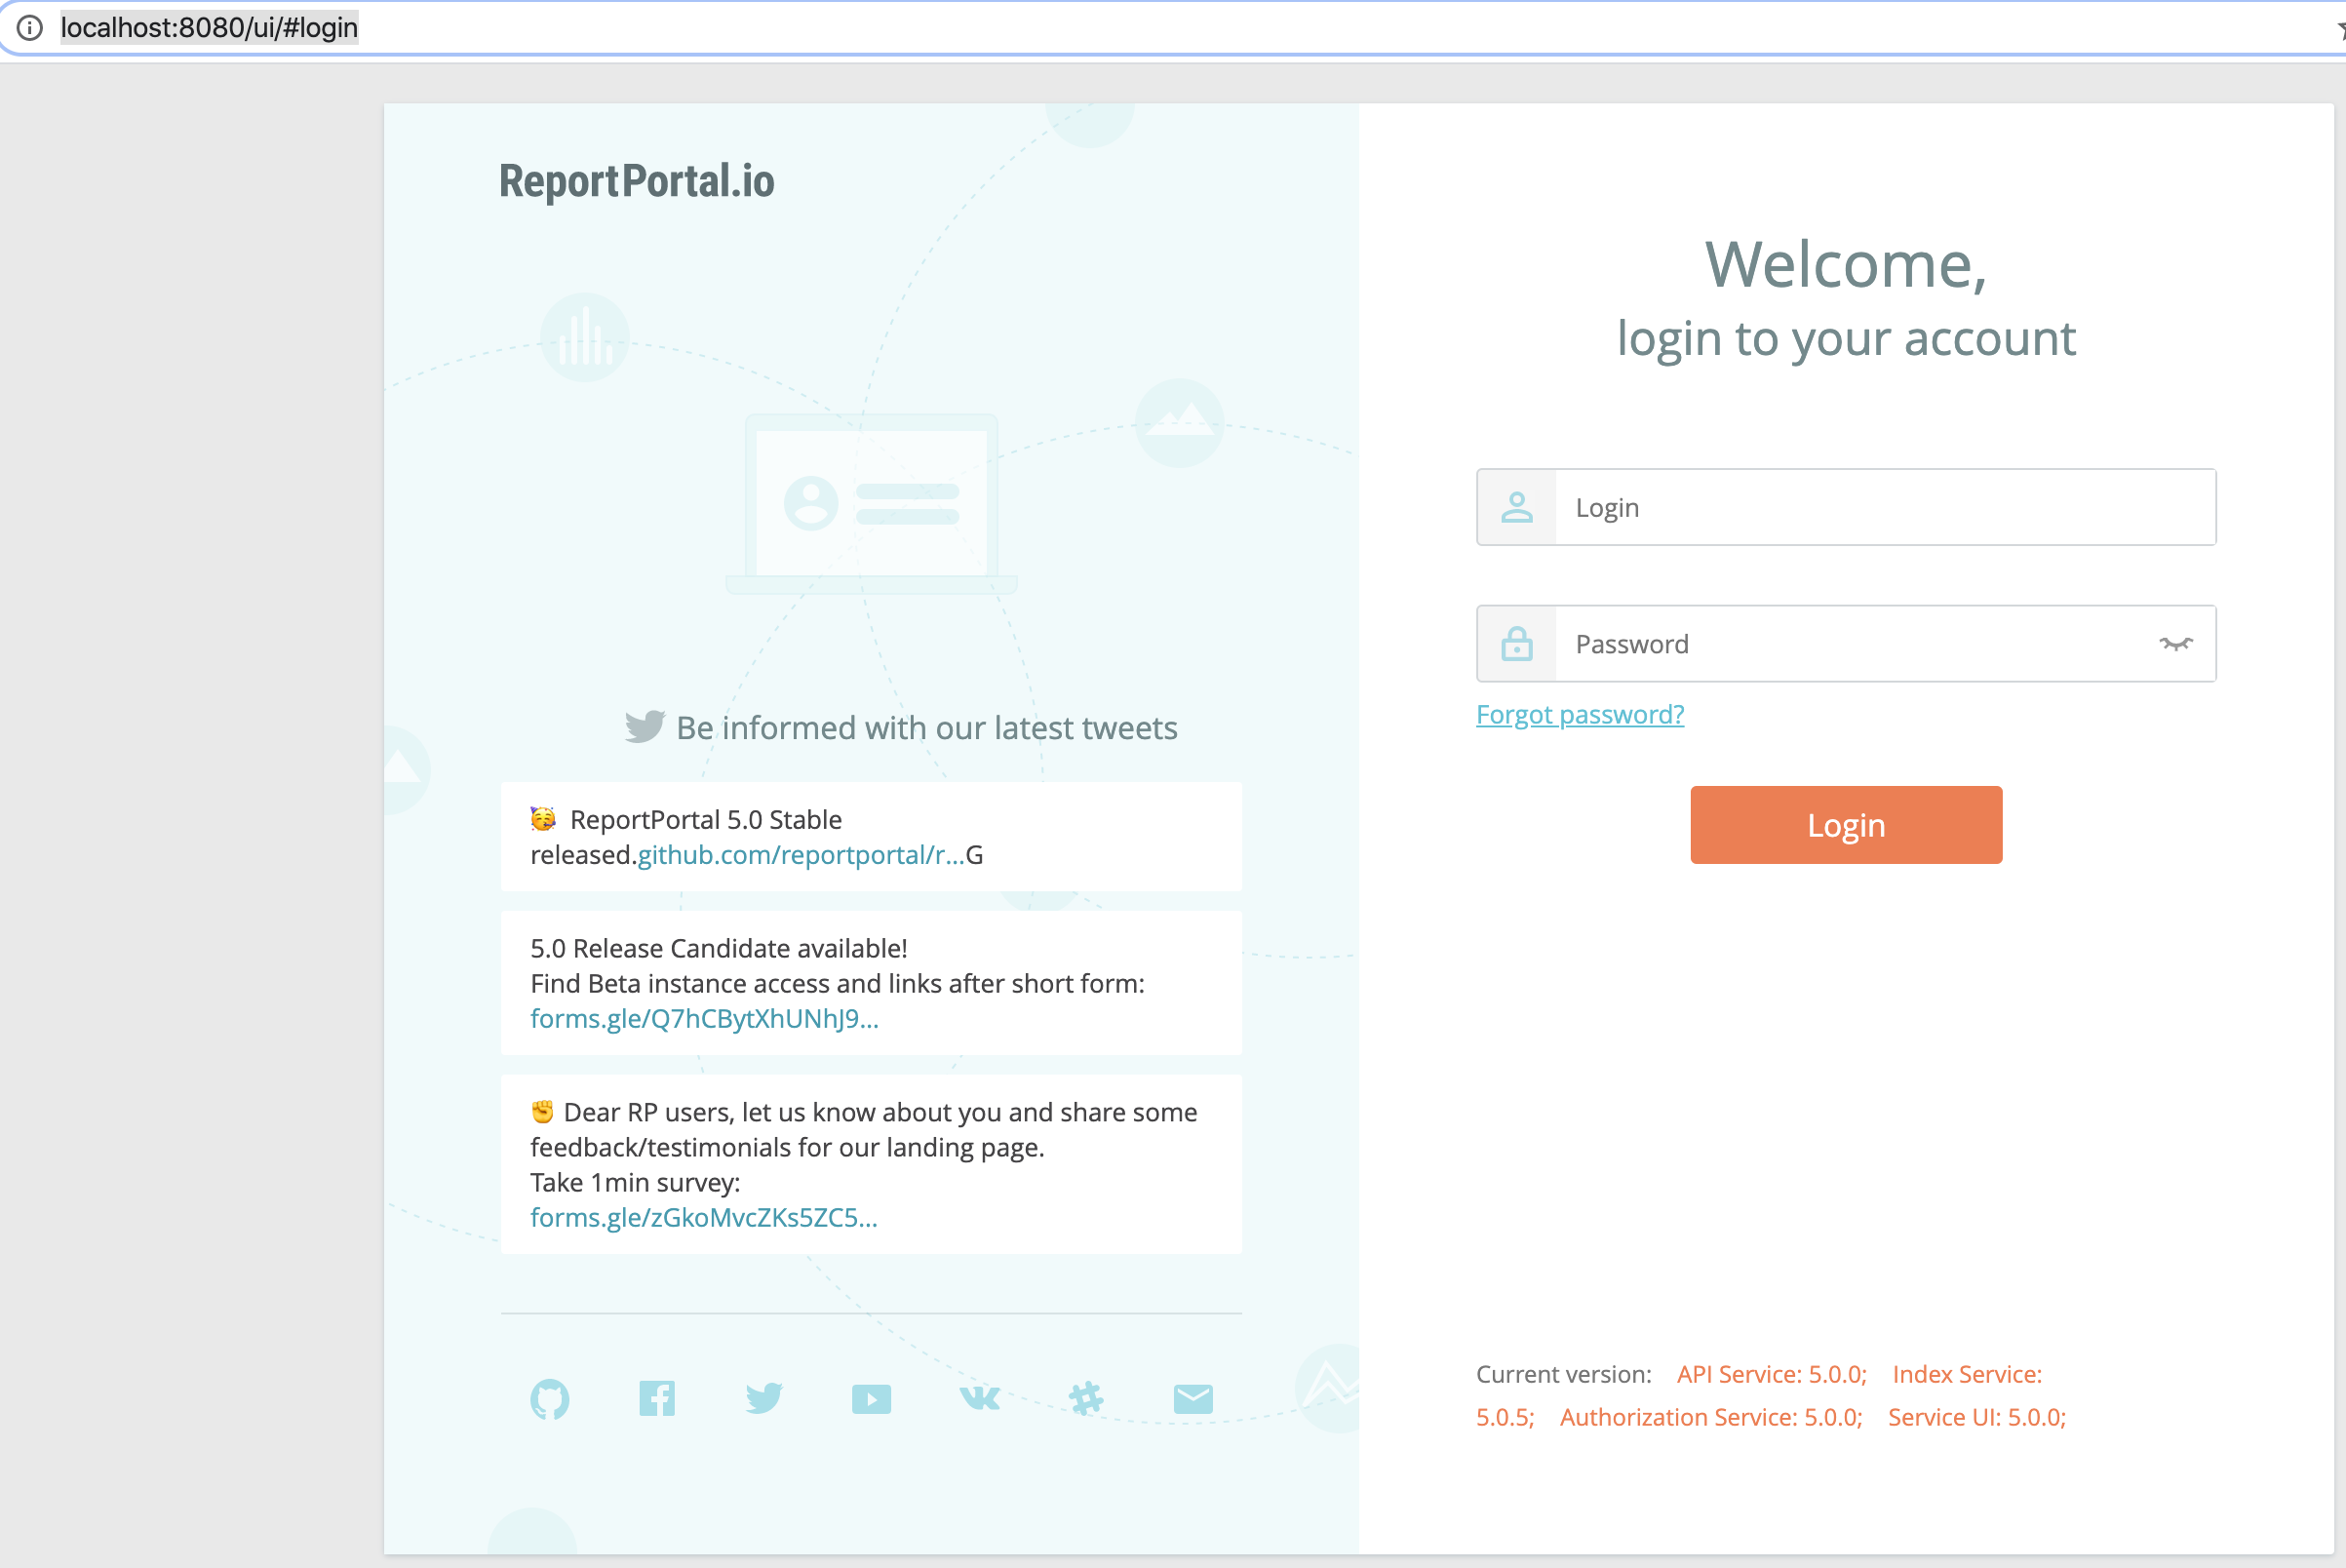
You can log in with the default user or admin passwords below:
default\1q2w3e
or
superadmin\erebus
Please remember to change these as soon as you login for security sake
Create a blank project
After logging in as admin, Let’s create a blank project for our test setup
Go to the top-right icon, select Administrate and then create a new project. I have created a dummy project by the name of test_project
Once created, select the project from the drop-down list and then again click on the login information section and select Profile.

Make a note of the information in the Profile section, we are going to need it later on
Setting up Gradle, dependencies, and listener
ReportPortal can easily be set up with any build tool of your choice.
In this example, we are going to use Gradle and then set up the required dependencies and the report portal listener which would be able to capture the test execution events and send them in real-time to our dashboard
Below is the basic configuration to set up the required agent and listener via gradle
Explanation
- Ln 10 – 13 sets up the maven repository for ReportPortal on the bintray site
- Ln 15 – 21 sets up an overridden task of type
Testwith logic to print all output on the console (Ln 17), disable the use of default listeners (Ln 18) and registers the ReportPortal TestNG listener (Ln 19) - Ln 25 Set up a basic TestNG agent
- Ln 26 Setup the latest version of TestNG
Setup properties file
Create a file named reportportal.properties under test/resources and paste the earlier copied
content from the profile section of your created project
A simple test
I have a verify basic TestNG test setup in the test folder which should always fail (for demo purposes)

Let’s run
Now, let’s run the suite. Execute below command:
./gradlew clean runTests
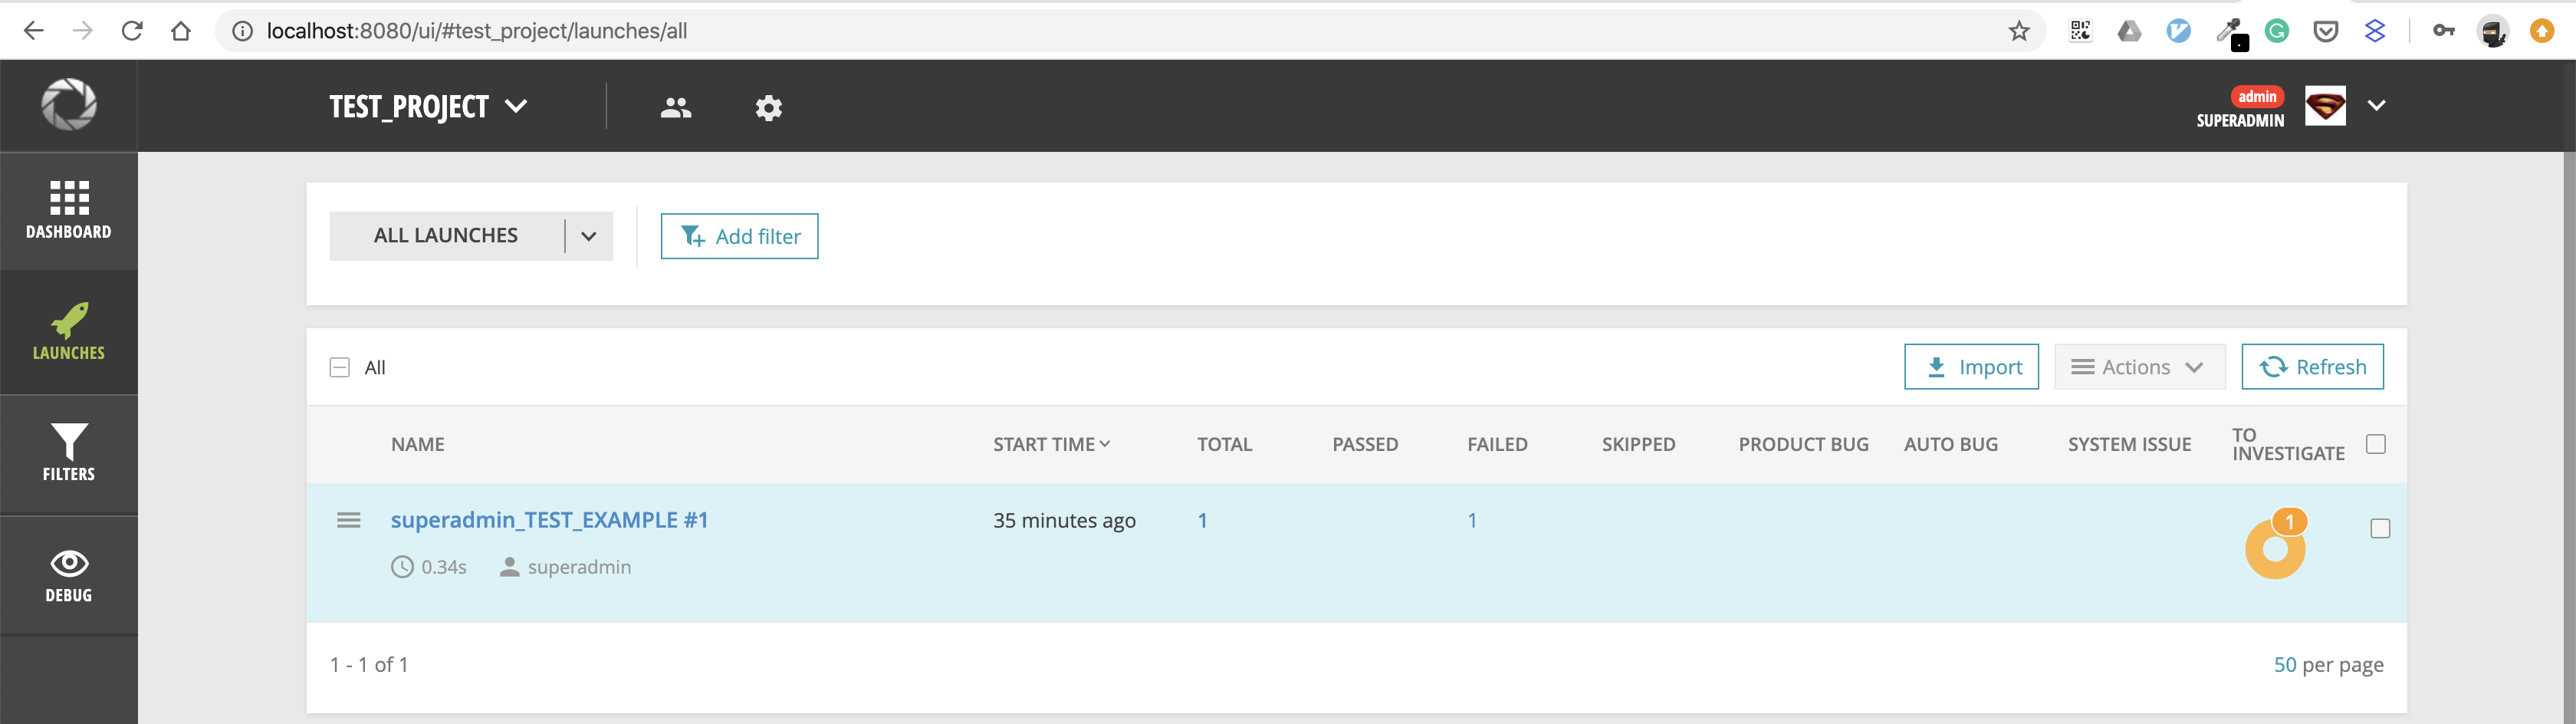
Once the suite executes, we can observe the failure in the ReportPortal as a launch
Launches
Every unique test run is called a launch in the ReportPortal.
We can now select the launch to see an overview of the run. We can also see that our suite failed as expected.
We can select the failure to see more details and mark each test under different categories (Product bug, automation bug, system issue). By default, every test is marked as To investigate
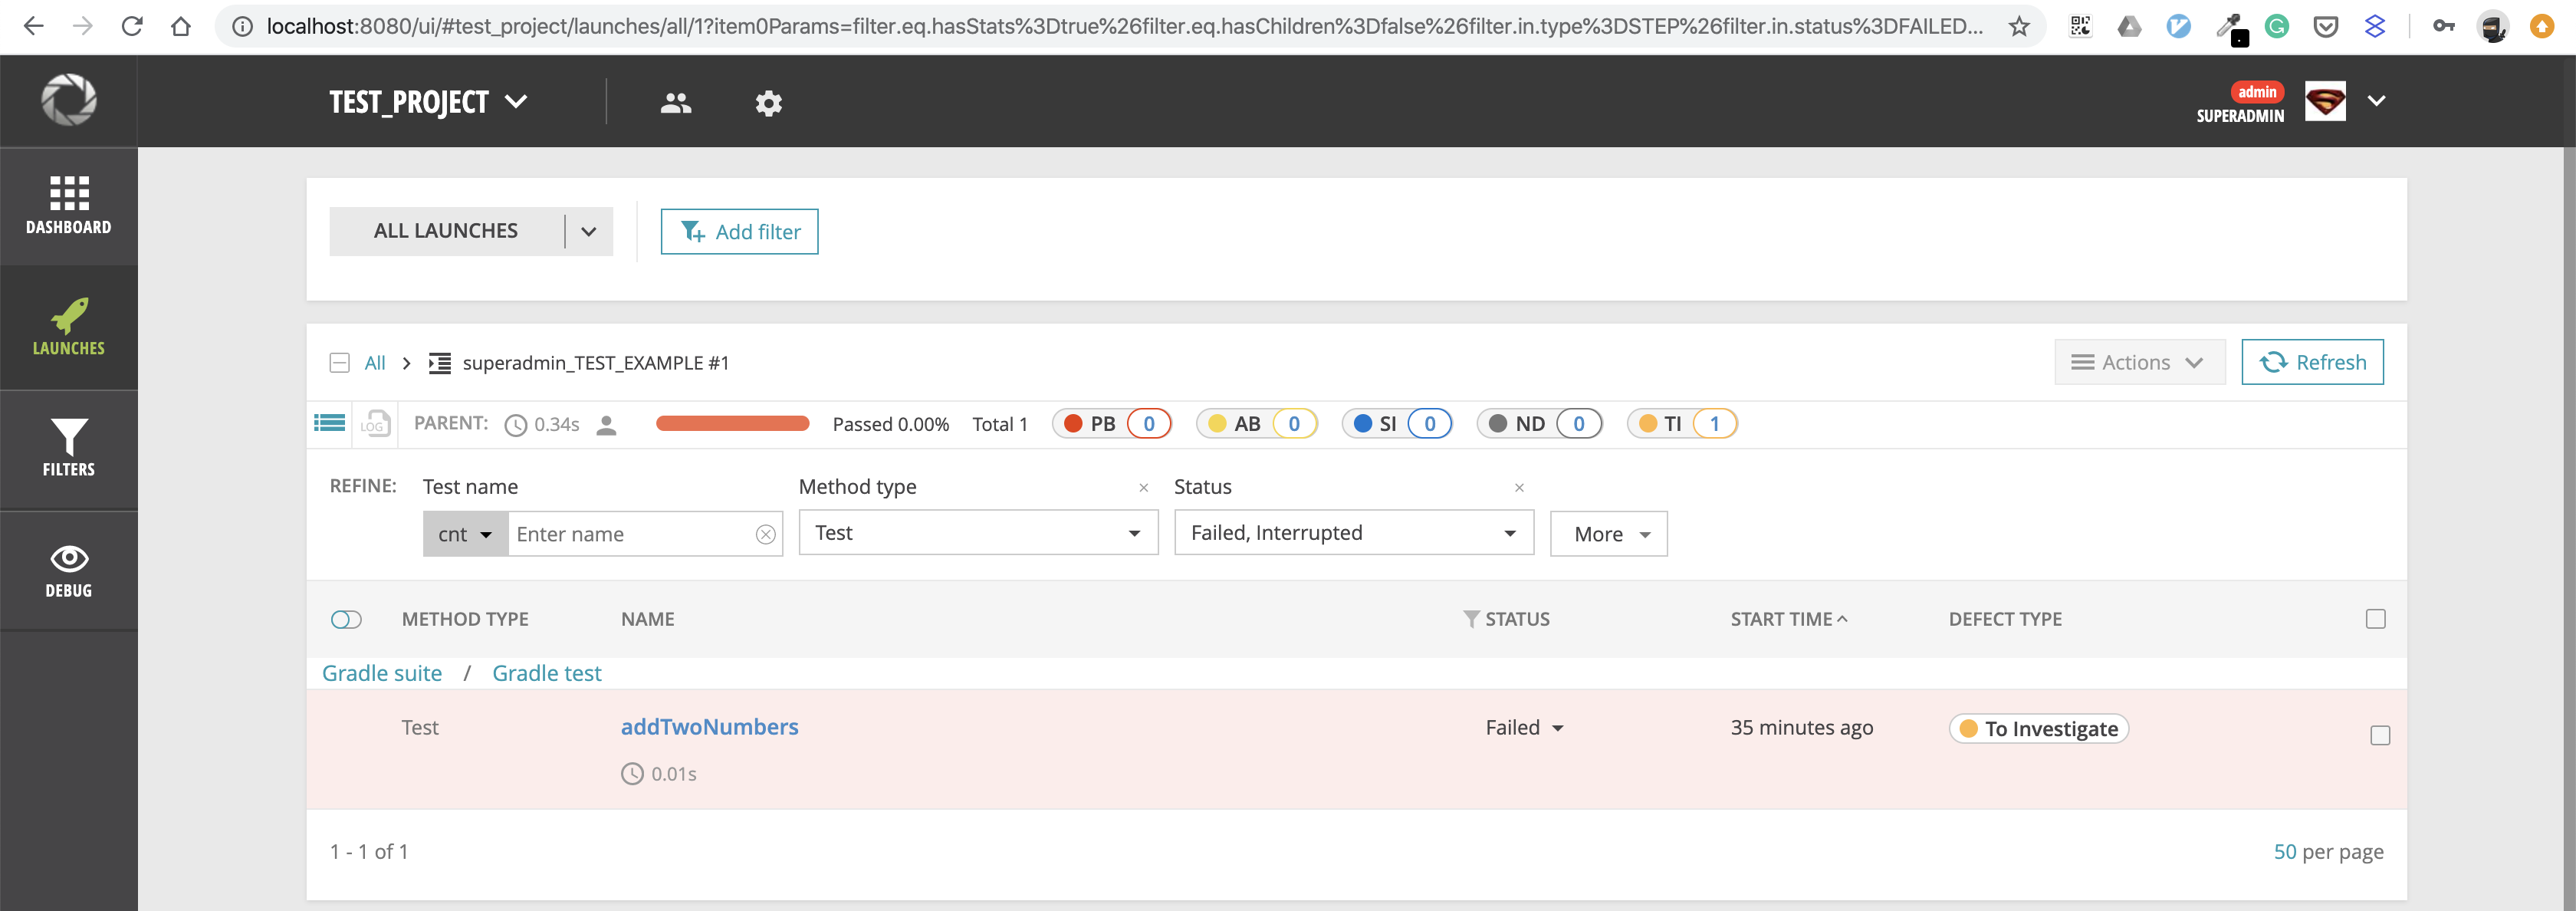
Also, we can click on the test and see the full stack trace of the failure similar to the Gradle report. However, as more tests are run, we are able to easily see a historical snapshot of the same test and how it behaved in different launches.

Conclusion
ReportPortal is an exciting new tool and gives you the ability to have a central dashboard for all your different test runs regardless of the framework you have used to author it.
In future posts, we would see
- How to set up logging in the test
- Create widgets on the dashboard
- Configure ReportPortal for optimum use
In case you found this post useful. Do share it with your friends or colleagues.
References
There are many resources already available about the ReportPortal. Check them out.
Comments